 Creating in-game support
When you first load a map in Q3A there's an image
of the map with the title and maybe a little info on
the level it'self. You can do this as well with your
custom maps by simply capturing a screen shot
of your map while playing it on your machine.
By hitting the 'f11' key while the game is running
it will write a .tga file to the 'screenshots' folder
in baseq3 within the Quake 3 directory. You'll
need a basic graphics editor such as Paint Shop
Pro or Adobe's PhotoShop. You can get a demo
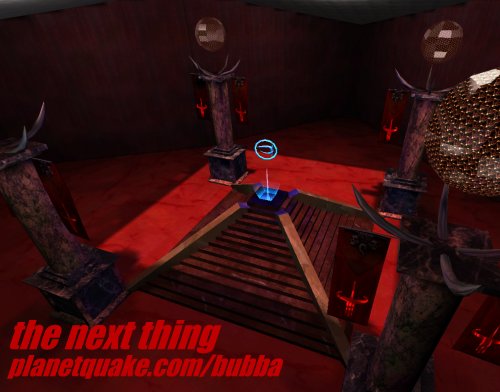
of Paint Shop here. Below is an example of a
screen shot that has been touched up and
converted to a .jpg to conserve space.
 A nice touch is to add a map name or even include
a link to a website if you've got one. Make sure
the image has the exact same name as your map.
Save the image in a folder called 'levelshots' and
place the folder in your baseq3 directory within
Quake 3. You can also include the folder with a
.pk3 so that when downloaded others will see the
same image when installed. Here's a link to the
tutorial that goes into detail on .pk3 files.
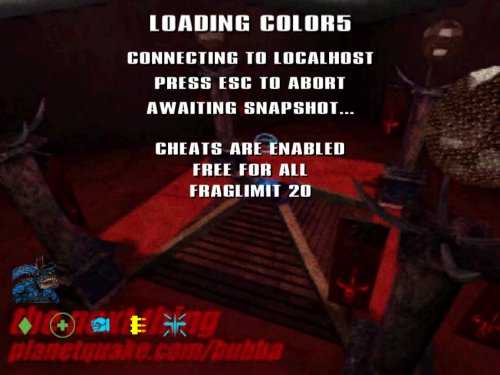
 This is what the player will see while the map
loads. Once again it just adds a nice touch to
your map and gives it more of an authentic feel.

 Creating in-game support
When you first load a map in Q3A there's an image
of the map with the title and maybe a little info on
the level it'self. You can do this as well with your
custom maps by simply capturing a screen shot
of your map while playing it on your machine.
By hitting the 'f11' key while the game is running
it will write a .tga file to the 'screenshots' folder
in baseq3 within the Quake 3 directory. You'll
need a basic graphics editor such as Paint Shop
Pro or Adobe's PhotoShop. You can get a demo
of Paint Shop here. Below is an example of a
screen shot that has been touched up and
converted to a .jpg to conserve space.
 A nice touch is to add a map name or even include
a link to a website if you've got one. Make sure
the image has the exact same name as your map.
Save the image in a folder called 'levelshots' and
place the folder in your baseq3 directory within
Quake 3. You can also include the folder with a
.pk3 so that when downloaded others will see the
same image when installed. Here's a link to the
tutorial that goes into detail on .pk3 files.
 This is what the player will see while the map
loads. Once again it just adds a nice touch to
your map and gives it more of an authentic feel.
