 Custom Textures
In this tutorial you'll learn how to
use custom textures in your maps.
You'll need a graphics editor for this tutorial. If you
don't allready have one you can download a thirty
day evaluation of Paint Shop Pro here. If you have a
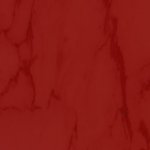
scanner your options are even greater. Below you
can see a marble texture I snagged from 3DCafe and
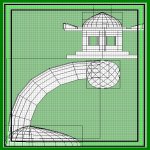
used the fill tool with red on high opacity. The next
image is a graphic that I scanned from a college
text. The final image is a colorized version of the
second graphic with a pattern fill surounding it
with the first graphic. The floor of the room uses the
red marble texture and the objective is to insert the
new graphic seamlessly into the floor.
Custom Textures
In this tutorial you'll learn how to
use custom textures in your maps.
You'll need a graphics editor for this tutorial. If you
don't allready have one you can download a thirty
day evaluation of Paint Shop Pro here. If you have a
scanner your options are even greater. Below you
can see a marble texture I snagged from 3DCafe and
used the fill tool with red on high opacity. The next
image is a graphic that I scanned from a college
text. The final image is a colorized version of the
second graphic with a pattern fill surounding it
with the first graphic. The floor of the room uses the
red marble texture and the objective is to insert the
new graphic seamlessly into the floor.

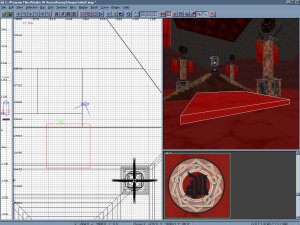
 Here is a shot of where the graphic will go. Quake 3
uses two graphic formats. The first is the .jpeg format
which is a compressed image that captures decent
visual quality. The second is the .tga format that has
fantastic visual quality at 32 bit color depth but can
really bloat the size of your map and reduce frames.
Now go into your baseq3 directory of your Quake 3
folder and create a 'textures' folder. Now within this
new folder make another called 'test'. It will be in this
folder that you'll save all of your new textures. If your
textures really start to dominate your map then simply
create more folders to accomodate the images.
Here is a shot of where the graphic will go. Quake 3
uses two graphic formats. The first is the .jpeg format
which is a compressed image that captures decent
visual quality. The second is the .tga format that has
fantastic visual quality at 32 bit color depth but can
really bloat the size of your map and reduce frames.
Now go into your baseq3 directory of your Quake 3
folder and create a 'textures' folder. Now within this
new folder make another called 'test'. It will be in this
folder that you'll save all of your new textures. If your
textures really start to dominate your map then simply
create more folders to accomodate the images.

 When you launch Radiant and go to the textures option
on the toolbar you should see the 'test' folder appear in
the list. Now back in the map create a basic brush that
will act as the canvas that will display your new image.
Make sure that your new image is in the 'test' folder so
it can be selected from the texture window on Radiant.
When you launch Radiant and go to the textures option
on the toolbar you should see the 'test' folder appear in
the list. Now back in the map create a basic brush that
will act as the canvas that will display your new image.
Make sure that your new image is in the 'test' folder so
it can be selected from the texture window on Radiant.